

|
TFI Relocation Kits for V8 Miatas and all Ford TFI Engines! |
|
Don’t let the heat under your Ford’s hood fry another TFI Module! |
|
· Relocates your TFI Module from the distributor housing to the passenger fender.
· Cost half as much as a new distributor or Module.
· (NEW!!!) Heat sink is Custom Designed by MRM to work with all TFI-equipped vehicles. All materials are aluminum or stainless steel so it looks as nice in a year as it does now! NO RUST!!!
· Harness is FULLY RF SHIELDED and grounded!!!
· (NEW!!!) Requires NO TOOLS other than a ratchet wrench, a drill and a Ford TFI removal tool (available for rent from us). NO SOLDERING OR WIRE CUTTING REQUIRED in most applications.
· Need a Ford TFI module wrench to remove your old module? NO PROBLEM! We’ll rent you a Ford TFI tool for an additional $15 and refund you $13 of it if you get the tool back to us within 30 days of delivery! Remember, we include a set of replacement cap screws and an allen key to replace the original screws so there is little reason to actually go and a TFI wrench!
|
|
Ford realized very early that their original plan to use the distributor housing as a heat sink for the 5.0’s ignition module was a bad idea. It took a class-action lawsuit in the 1990’s to make them do something about it. The TFI (Thick Film Ignition) Module is very susceptible to heat damage. The symptoms of this damage can be as light as a occasional miss and tachometer fluctuation to as severe as complete ignition system failure. Getting the car back on the road requires at least the replacement of the TFI Module with new, the price of which can be over $100! The problem is so severe that we know of several Mustang and 5.0 Miata drivers who simply kept a spare TFI in their glove boxes in case the thing fails on the road. Here’s an article from the Center for Auto Safety webpage that goes into greater detail:
1983-1995 Ford Ignition Module Stalling
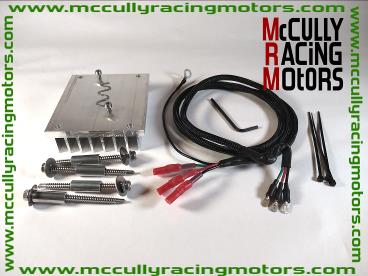
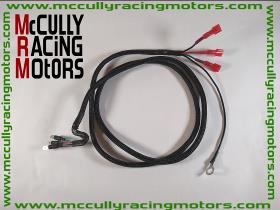
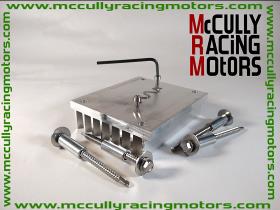
Our TFI relocation kit includes a custom designed extruded aluminum heat sink with just enough Arctic Silver Heat sink grease (much more effective grease that the “white” grease typically used) to handle the job pre applied (no need to buy a $12.00 tube just for this one job). The kit includes four aluminum 1” spacers to locate the heat sink off the frame of your car to allow a full 360 degrees of cooling and four stainless steel self-tapping screws to mount it with. Two stainless steel cap screws and a an allen key are included to replace the original Ford Module mounting screws which required an uncommon tool to remove (we can rent you a Ford TFI removal tool if you need one...see below). To connect the relocated TFI module to the distributor a 36” jumper harness is included. The harness is completely RF shielded by a layer of copper RF/EMI tape with conductive adhesive. A grounding wire is wound into the RF layer to provide to ground the harness. To protect the RF layer an outer layer of vinyl tape is applied last and heat sealed to each end. The distributor end of the harness includes three male spade connectors that attach to the three female connectors on the underside of the distributor (the stator coil). The TFI end terminates with three female spade connectors that push onto the three prongs that stick out from the top of your TFI module. The TFI end also includes the RF ground lead with eyelet that can be grounded to any good ground source, even the bolt you hold the heat sink in place with. Both ends, as well as the individual connectors, are weather sealed with heat shrink.
We originally developed this kit to help protect the TFI module from melt-down in the very hot and cramped engine bays of V8 Monster Miatas. Since offering them for sale customers have installed them in many other distributor-mounted TFI Fords including Broncos, F-150’s, Escorts, Tauruses and Mustangs (a complete list of applications can be found below).
Don’t let your TFI system fail on you at a bad time. By using this system you ensure that your TFI is getting the cool air it needs to properly function. |
|
Our TFI Relocation kits include a custom TFI heat sink and a custom harness to link it to your distributor (actual TFI Module not included). |

|
McCully Racing Motors Quakertown/Barto, PA |
|
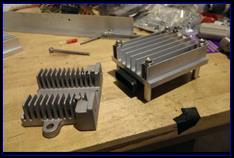
Tech Talk: OLD (left) vs. NEW (right): Our old kits used a reclaimed Ford heat sink which mounted the module on top between the vanes. To be dissipated heat had to travel down from the bottom of the module , sideways and then up. Heat rises. With this in mind we designed our new heat sinks with an “underslung” module mount so that the module’s heat only has to travel up (it’s natural inclination) to be dissipated. As an added bonus the underslung design protects the module better against it’s second biggest downfall, water. SCIENCE!!!! |
|
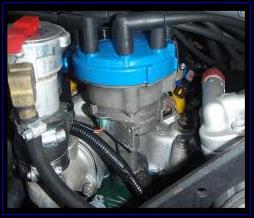
Here we see the distributor end of the system. The custom harness simply plugs in where the TFI module would have gone. Note that this picture is of an early harness, current harnesses have a “U” shape at this end and zip tie in place to the hole in the middle of the picture. |
|
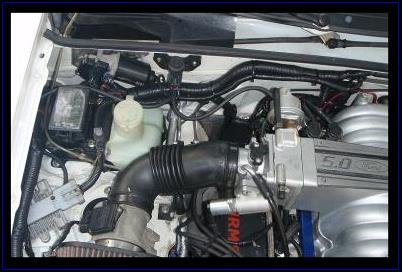
To install simply reroute your TFI Module’s wiring around the passenger side fender, bolt you module on the heat sink and then use the custom harness to connect it to your distributor. NOTE: old style heat sink shown above |
|
Home |

|
Products |

|
Builds |

|
Who is MRM? |

|
FAQ |

|
Links |

|
Video Links |

|
Random Pics |



McCully Racing Motors |
|
Because two heads are ALWAYS better than one. |
|
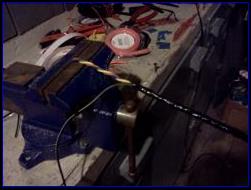
Harness Cable Construction: |
|
We start by winding the three main extension wires. Three different colors are used to help with proper orientation during installation (colors may vary): |
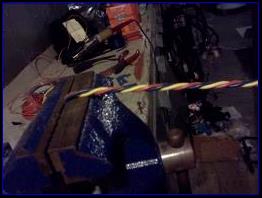
|
Next the three wires are wrapped in vinyl to seal them from the RF layer: |
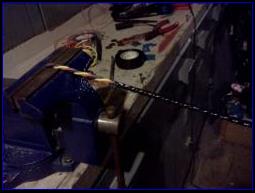
|
The RF ground is added and held in place: |
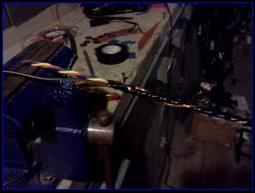
|
Next the RF shielding is wound around the entire length of the harness. The conductive adhesive backing makes contact with the bare ground wire to complete the grounding circuit: |
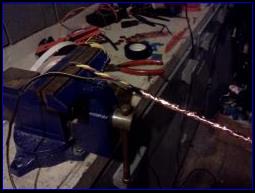
|
Last, the RF layer is covered in a final exterior layer of vinyl to protect it. |
|
Installation: |
|
Installation of the MRM TFI kit is very easy and can be accomplished in less than an hour if you know what you’re doing. First, unplug your harness from the TFI module. Next, unbolt the module from the distributor (requires a TFI removal tool...we’ll rent you one). Once the two small screws are removed, carefully slide the module down to release it from the stator coil in the distributor (do not pry the module outward, pull it down only!!!). If you are planning on reusing the original TFI module (not recommended-once they fry once they are usually dead), carefully clean the existing white heat sink grease off of the backing plate. The next step is to take your new or clean old TFI module and, using the original screws, mount it to the kit’s heat sink. DO NOT spread out the gray heat sink grease on the heat sink. The act of tightening the module against the heat sink will spread out the grease. Once the module and heat sink are assembled find a suitable location for it. The limiting factors are the reach of the kit’s extension harness (36”) and the reach of TFI branch of the car’s harness. In Miatas, we pull the TFI branch back from under the manifold, fold it back on itself, and run it down the passenger side fender (see installed pictures below). If need be, the firewall harness can be opened and the TFI wires pulled from it to gain a few more inches. Once a location has been found, use the included template to drill holes for the kit’s mounting screws (four included, use at least 2), tap the holes with one of the screws and bolt the heat sink down with the included aluminum spacers. Ground the RF shielding wire to one of the bolts holding the heat sink or any other near-by bolt (DO NOT use one of the screws mounting the module to the heat sink). Plug the distributor end of the harness into the three female connections on the underside of the distributor. This end of the harness has been formed into a “U” shape to help line up the connections. Once they are in place use one of the included zip ties to hold the harness in place against the one open hole that originally held the TFI module itself in place. Run the harness to the module’s new location and plug the three female plugs into the module with the wire colors in the same orientation as on the distributor end of the harness. Use the other included zip tie to secure the TFI end in place and you’re done! Double check your connections and make sure the harness is free of any moving parts and you’re ready to go. Full instructions can be downloaded by clicking here: TFI Heat Sink Install Instructions |
|
The following USDM Ford/Lincoln/Mercury vehicles were constructed with distributor-mounted TFI modules and can benefit from our TFI Relocation Kit. Note that some may require a bit more adaptation than others depending on the actual location of the module and length of the TFI branch of their main harnesses:
|
|
1984-85 Escort/Lynx (1.6L)
|
|
Application Data: |
|
The Kit includes the following: 1 heat sink with pre-applied heat grease 4 stainless steel #12 3” self tapping hex screws 4 stainless steel washers 4 aluminum 1” spacers 2 stainless steel M4 cap screws for module 1 3mm allen key for the above screws 3 cable ties 1 RF shielded and fully assembled TFI signal jumper harness *to keep the price down, installation instructions (5 pages) downloadable here: |
|
Price- $90 shipped (domestic) |